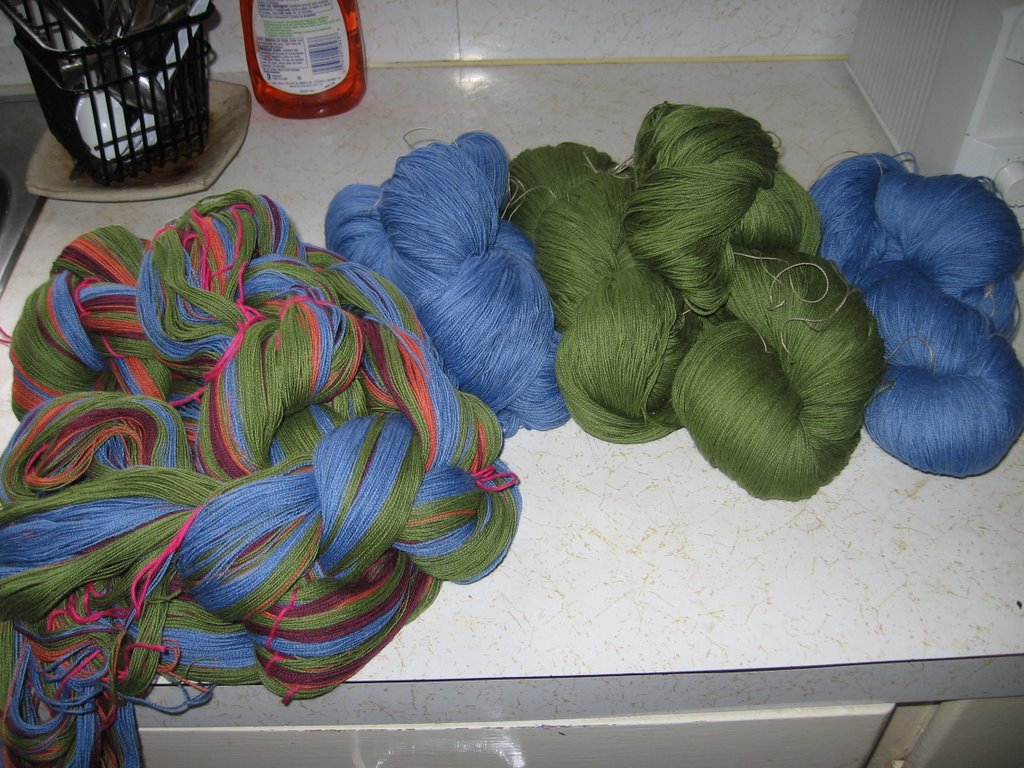
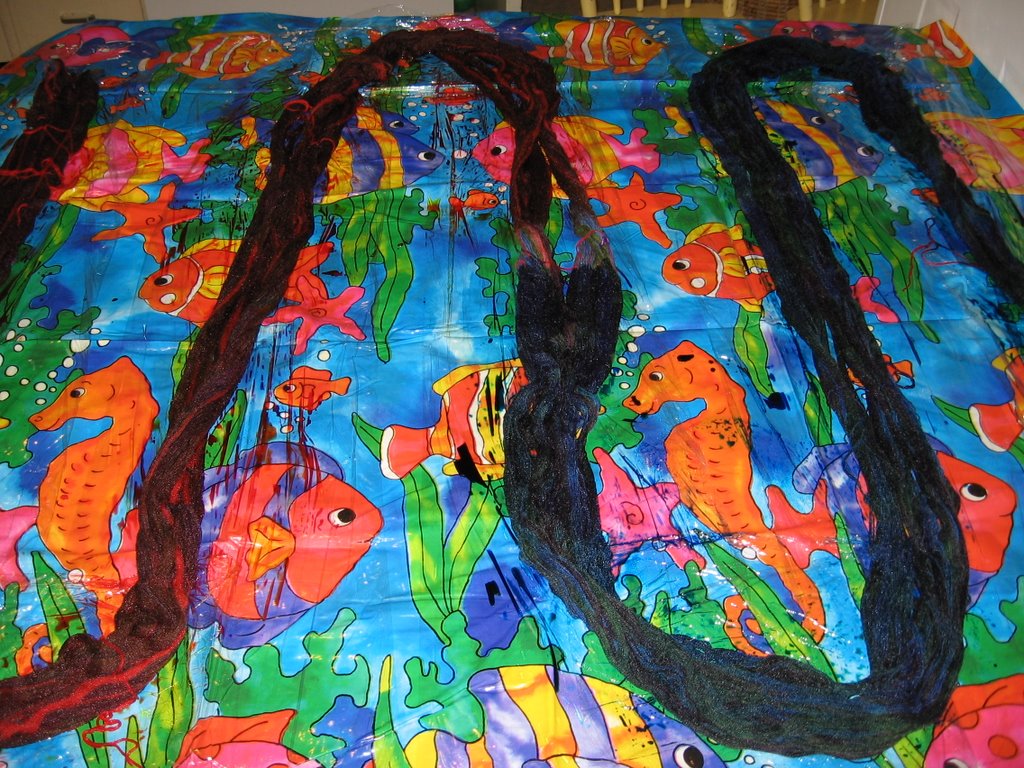
Yarns to dye (not to die for). The multicoloured bundle to the left is my warp. Fugly colours to my way of thinking. The blue and green bundles are my weft. they will be dyed one colour in a pot.
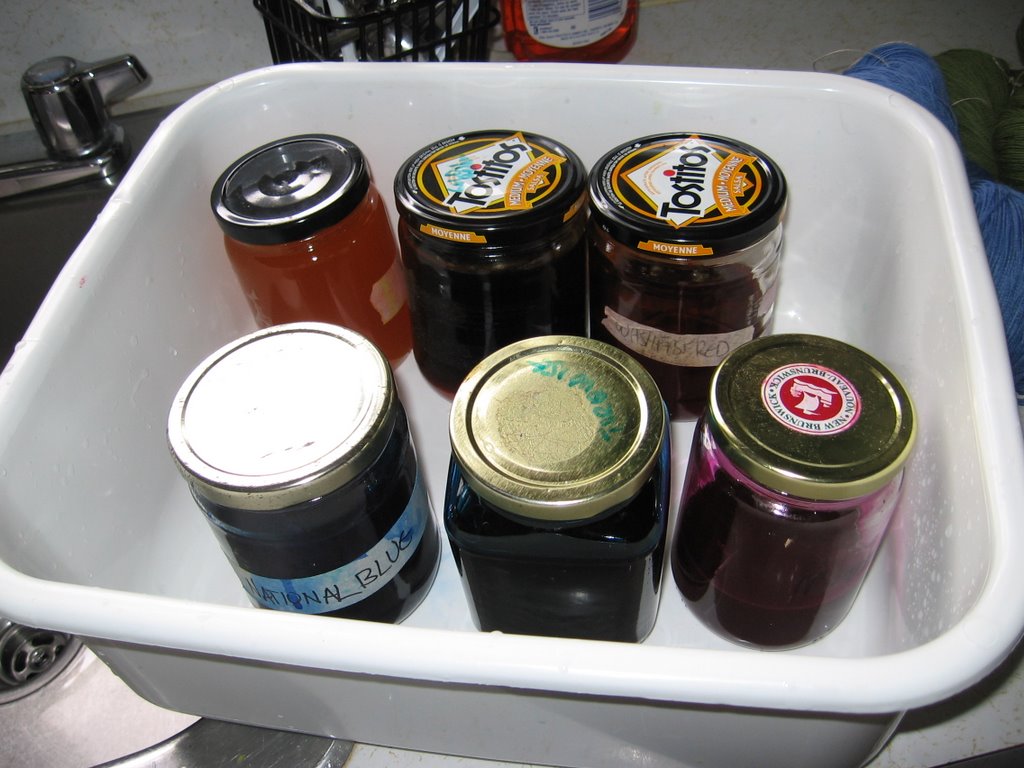
Dyes to dye them with.
On display are wash fast red, fuscia, yellow, golden yellow, turquoise, and national blue. Not here is what I shall call mystery green. Last summer when I was dyeing some warps, I had a little bit of a whole bunch of blues and yellows left over and so I mixed them into the mystery green that I shall never be able to reproduce. Oh well.
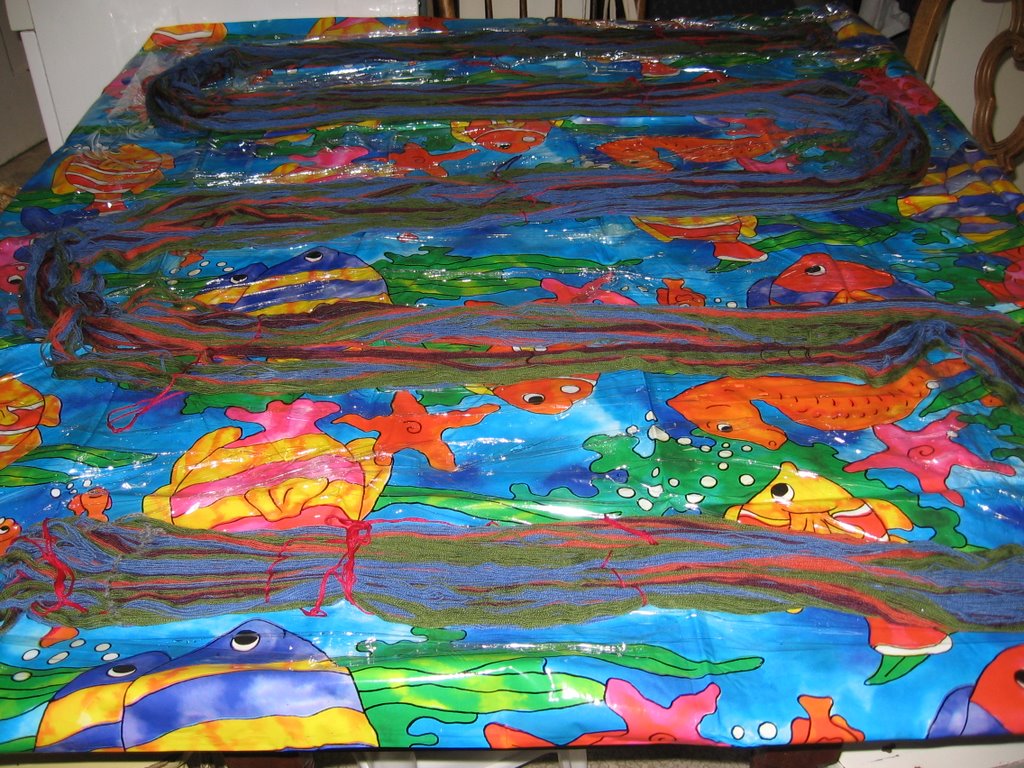
I soak my warp in cool water, to which a drop of dish soap has been added. Then I wring it out and soak it in vinegar. Wring most of the vinegar out.Then the warp gets spread out. Underneath my warp is a very distracting old shower curtain that I use to protect my table. Also underneath my warp is plastic wrap layed out in the same snakey pattern as the warp is. You will see it's use later.
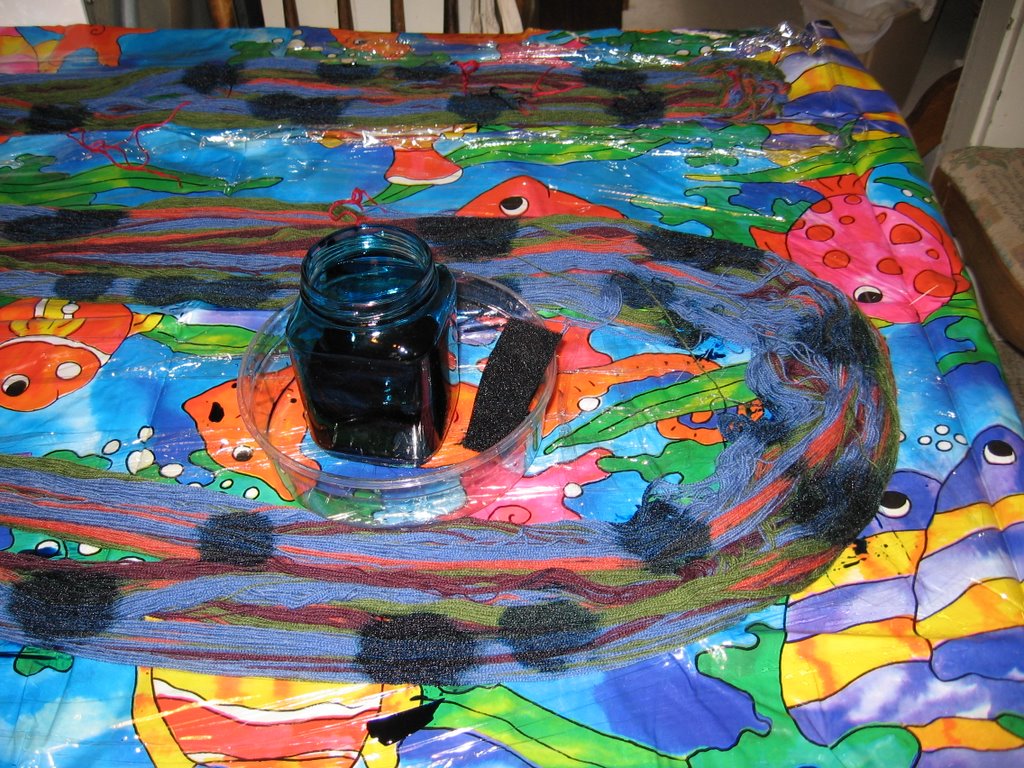
This is me applying the national blue. I have my pot of dye and a small sponge that I use to do the application. I basically plip the dyes down one colour at a time until I have the whole warp covered. Sorry I don't have more photos of the progression, But I got kind of caught up with all of the fun and forgot to snap picts.
Here is my warp with the dyes all applied. I massage the dyes in with my fingers and gently lift and look underneath to make sure that the dyes have penetrated to the bottom. Then it sits for about 30 minutes. Usually. This day, my husband, who had taken all of the children plus a spare to the university to see the annual robotics competition, called to say that there was nothing happening this year and they were on their way home. After the half hour, you are suppose to soak up the excess dyes with paper towels. Sometimes I do this , sometimes I don't. If you do soak up the excess dyes, there is less tendency for the colours to run together.
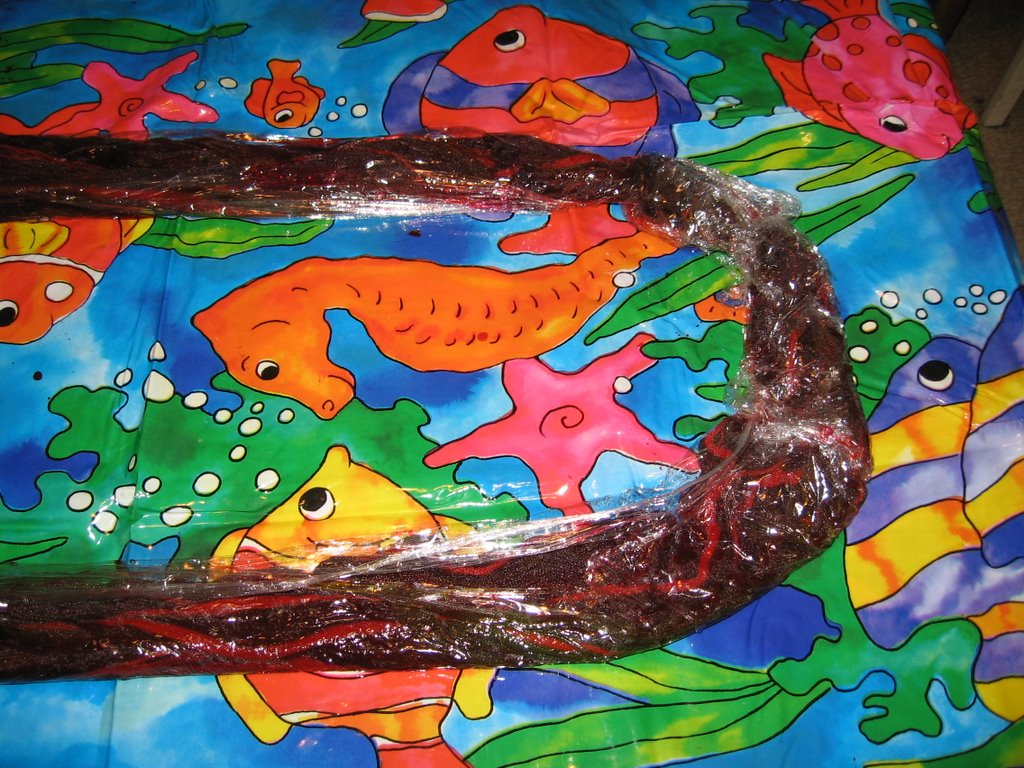
So I quickly wrapped the plastic wrap around my warp to seal it.
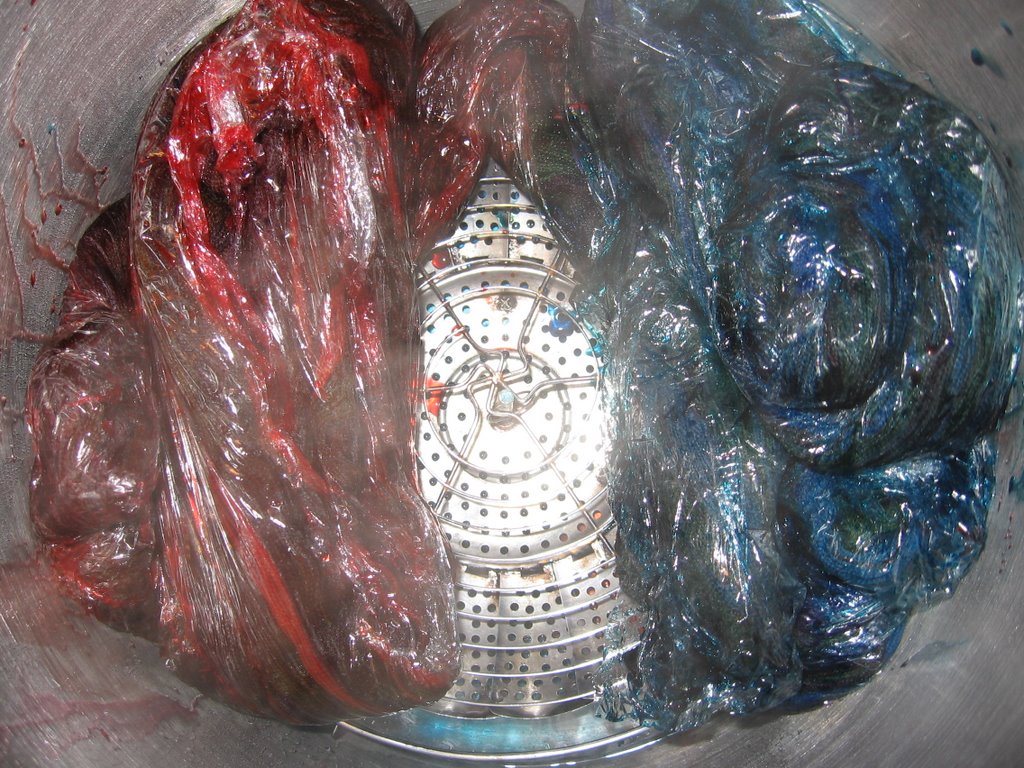
And put it in my pot to steam for an hour. I have a wire rack held about 3 inches off the bottom of the pot by one of those old metal veggie steamers. I keep the different ends of the warp as separate as I can so that I will not get reds in my blue end and blues in my red end. On goes the cover and the timer for 1 hour. Unlike rice, you can take the cover off from time to time to see how things are progressing. If you press a piece of paper towel to the yarn and it comes away clear, everything is set. Then I let it cool as long as possible. On my less impaitent days, this is until it is completely cooled. I find that the turquoise sets better if the yarns cool to room temperature.This day, I was able to hold off for about an hour.
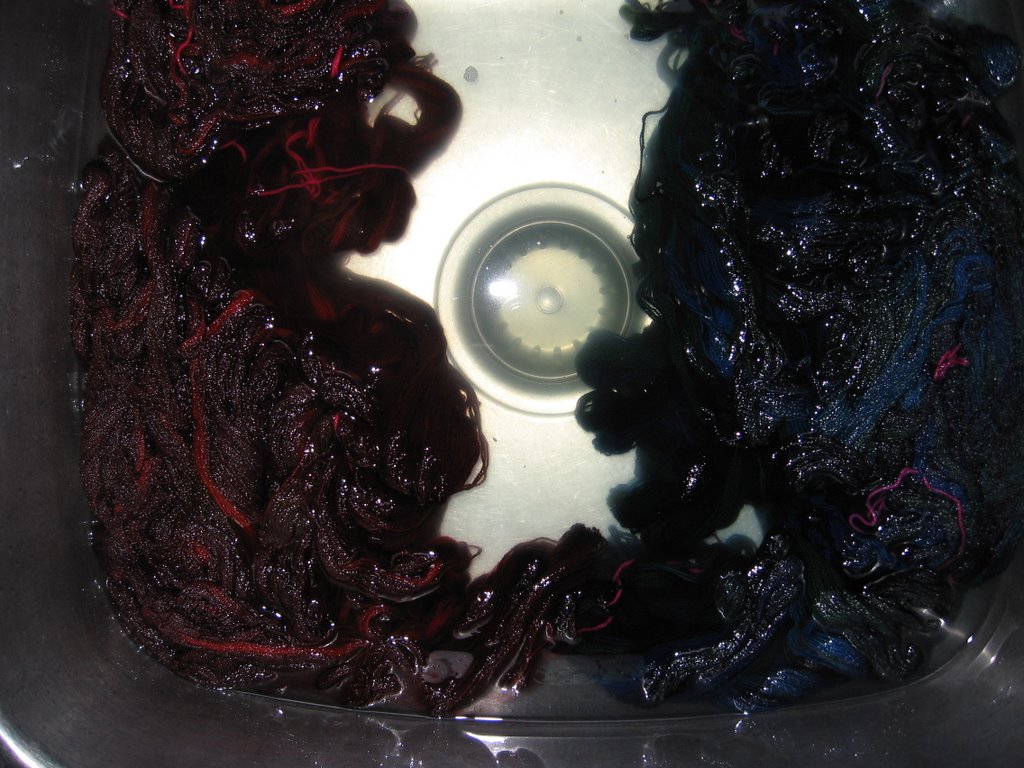
This is my first rinse. I love acid dyes because of the lack of runoff. I can and sometimes do use fiber reactive dyes to dye cottons and rayon, but I much prefer acids and wool and silk.

And here is my dyed warp. Of course the colours don't look as bright here as they do in real life and natural sunlight. The reds are not quite so orange and the blues are richer. The bright pink from time to time are the ties that I used every foot or so to keep my warp seperate when it was being soaked and wrung. They are woven in through the bundles of warp like a figure 8. Well , two 8's on top of eachother. You want them loose or they will act as a resist, and the dye will not penetrate.
This technique can be used to dye skeins too. Arrange plastic wrap in an oval shape and put the vinegar soaked skein on it before applying dyes. Put at least 4 ties around the skeins.
Or you can apply the dyes before the vinegar and apply the vinegar on with a spray bottle after the dyes have set for the half an hour.
This is space dying 101 completed. No guys in silver suits. Just me in my purple smock. Sorry Jay.
Any questions?
3 comments:
Thanks for sharing your techniques. I do it similar, but used the microwave oven. I haven't tried overdyeing, yet, though. It'll beinteresting to see how this all comes together for the Jay Challenge.
Oh wow, this is all so fascinating! I've always wondered about dyeing yarn, and I think looms are intriguing, but I don't understand them at all...I can't wait to watch this project progress...please keep us posted!
Nice tutorial! I LOVE handpainting roving.. so many color choices and combinations! I think I might have learned how to spin just so I could handpaint roving for it :-)
Great job!
Post a Comment